From 9to5mac.com
One of the headlining new features with iOS 17 is a smart landscape display mode for iPhone when it’s charging. Coming with different clock faces, widgets, access to photos, and more, here’s how to use and customize the iOS 17 iPhone Standby display.
iOS 17 comes with a number of changes across Messages, FaceTime, the Phone experience, and much more.
But one of the most attention-grabbing features will likely be the new iPhone StandBy view that turns the smartphone into a mini smart display akin to Amazon’s Echo Show.
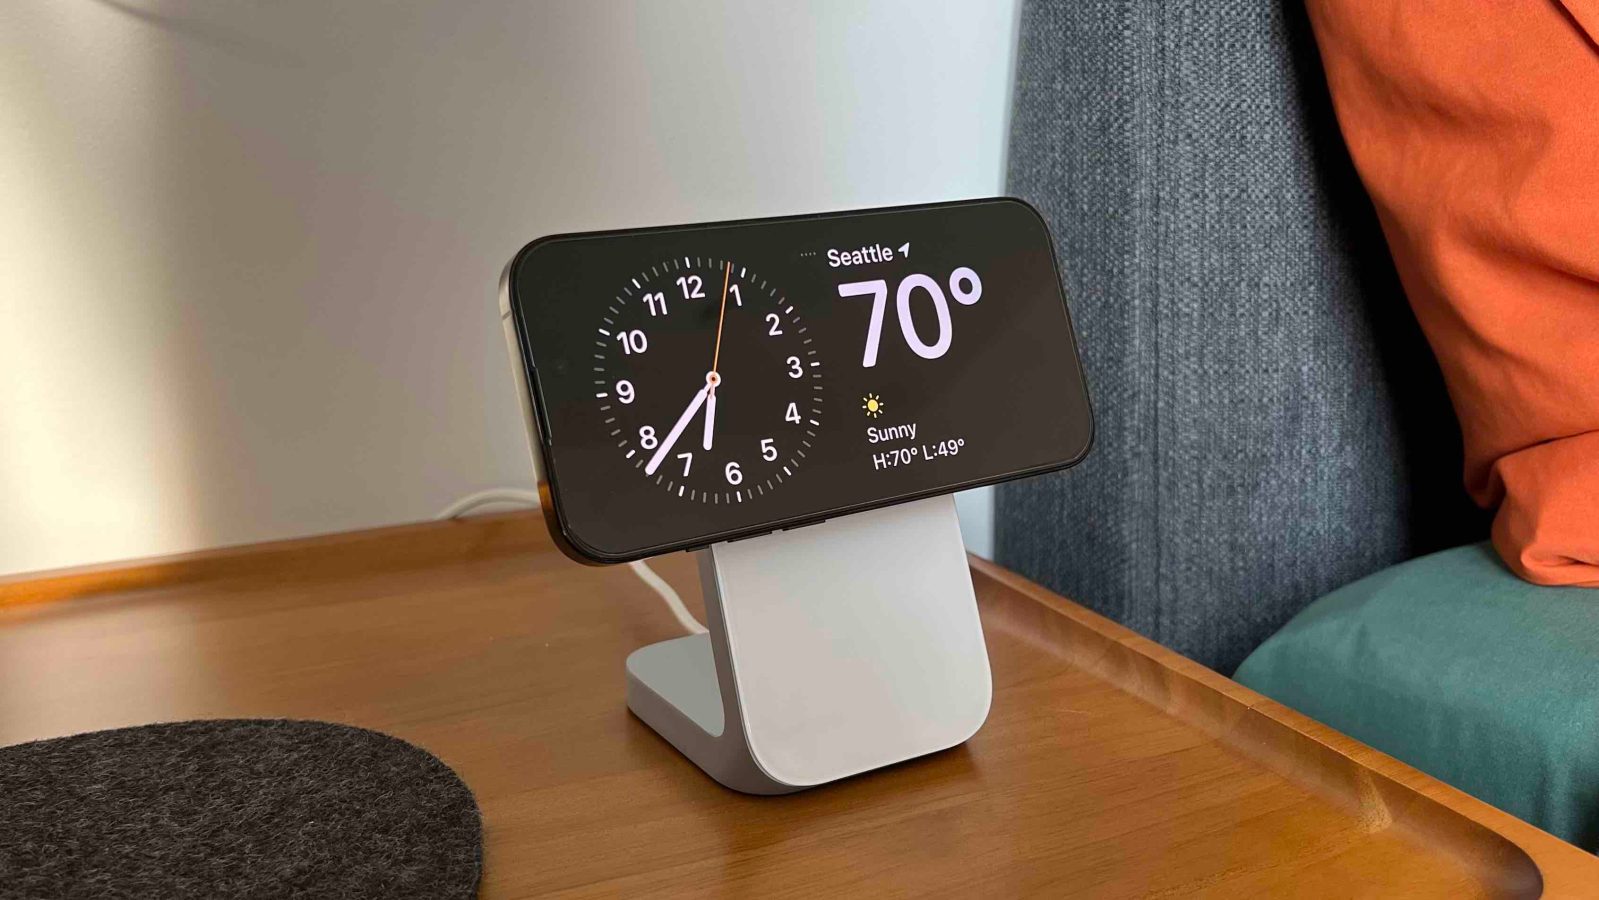
Shown above and below, I’m using the Nomad Stand One MagSafe charger. Here’s how StandBy works.
iOS 17 iPhone StandBy: How to use and customize
- Make sure you’re running the iOS 17 beta (install guide)
- With your iPhone screen locked, place it in landscape on an upright charger (the mode won’t work on flat or low-angle chargers or when your screen is unlocked)
- iPhone StandBy will automatically appear – the feature is enabled by default
- StandBy works on any iPhone that can run iOS 17 but you’ll need to tap the screen to see the clock, widgets, photos, etc. – iPhone 14 Pro/Pro Max with always-on will always show the StandBy display
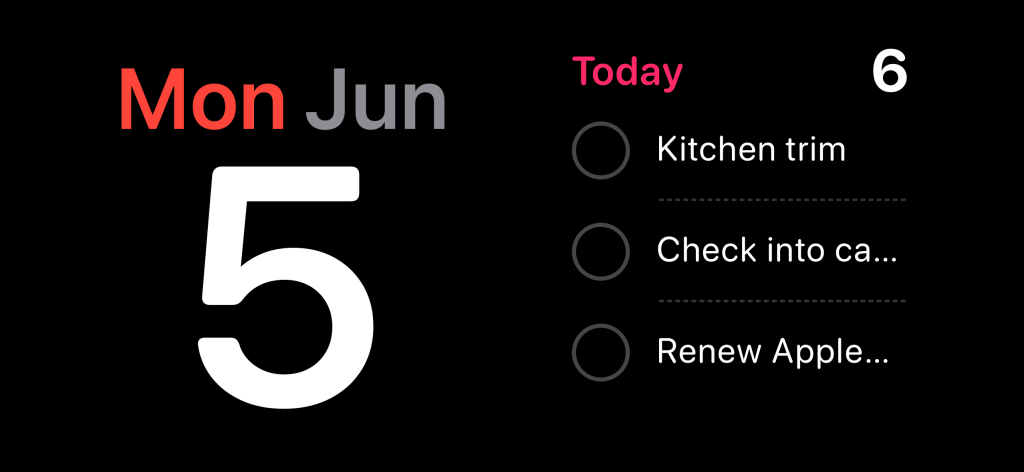
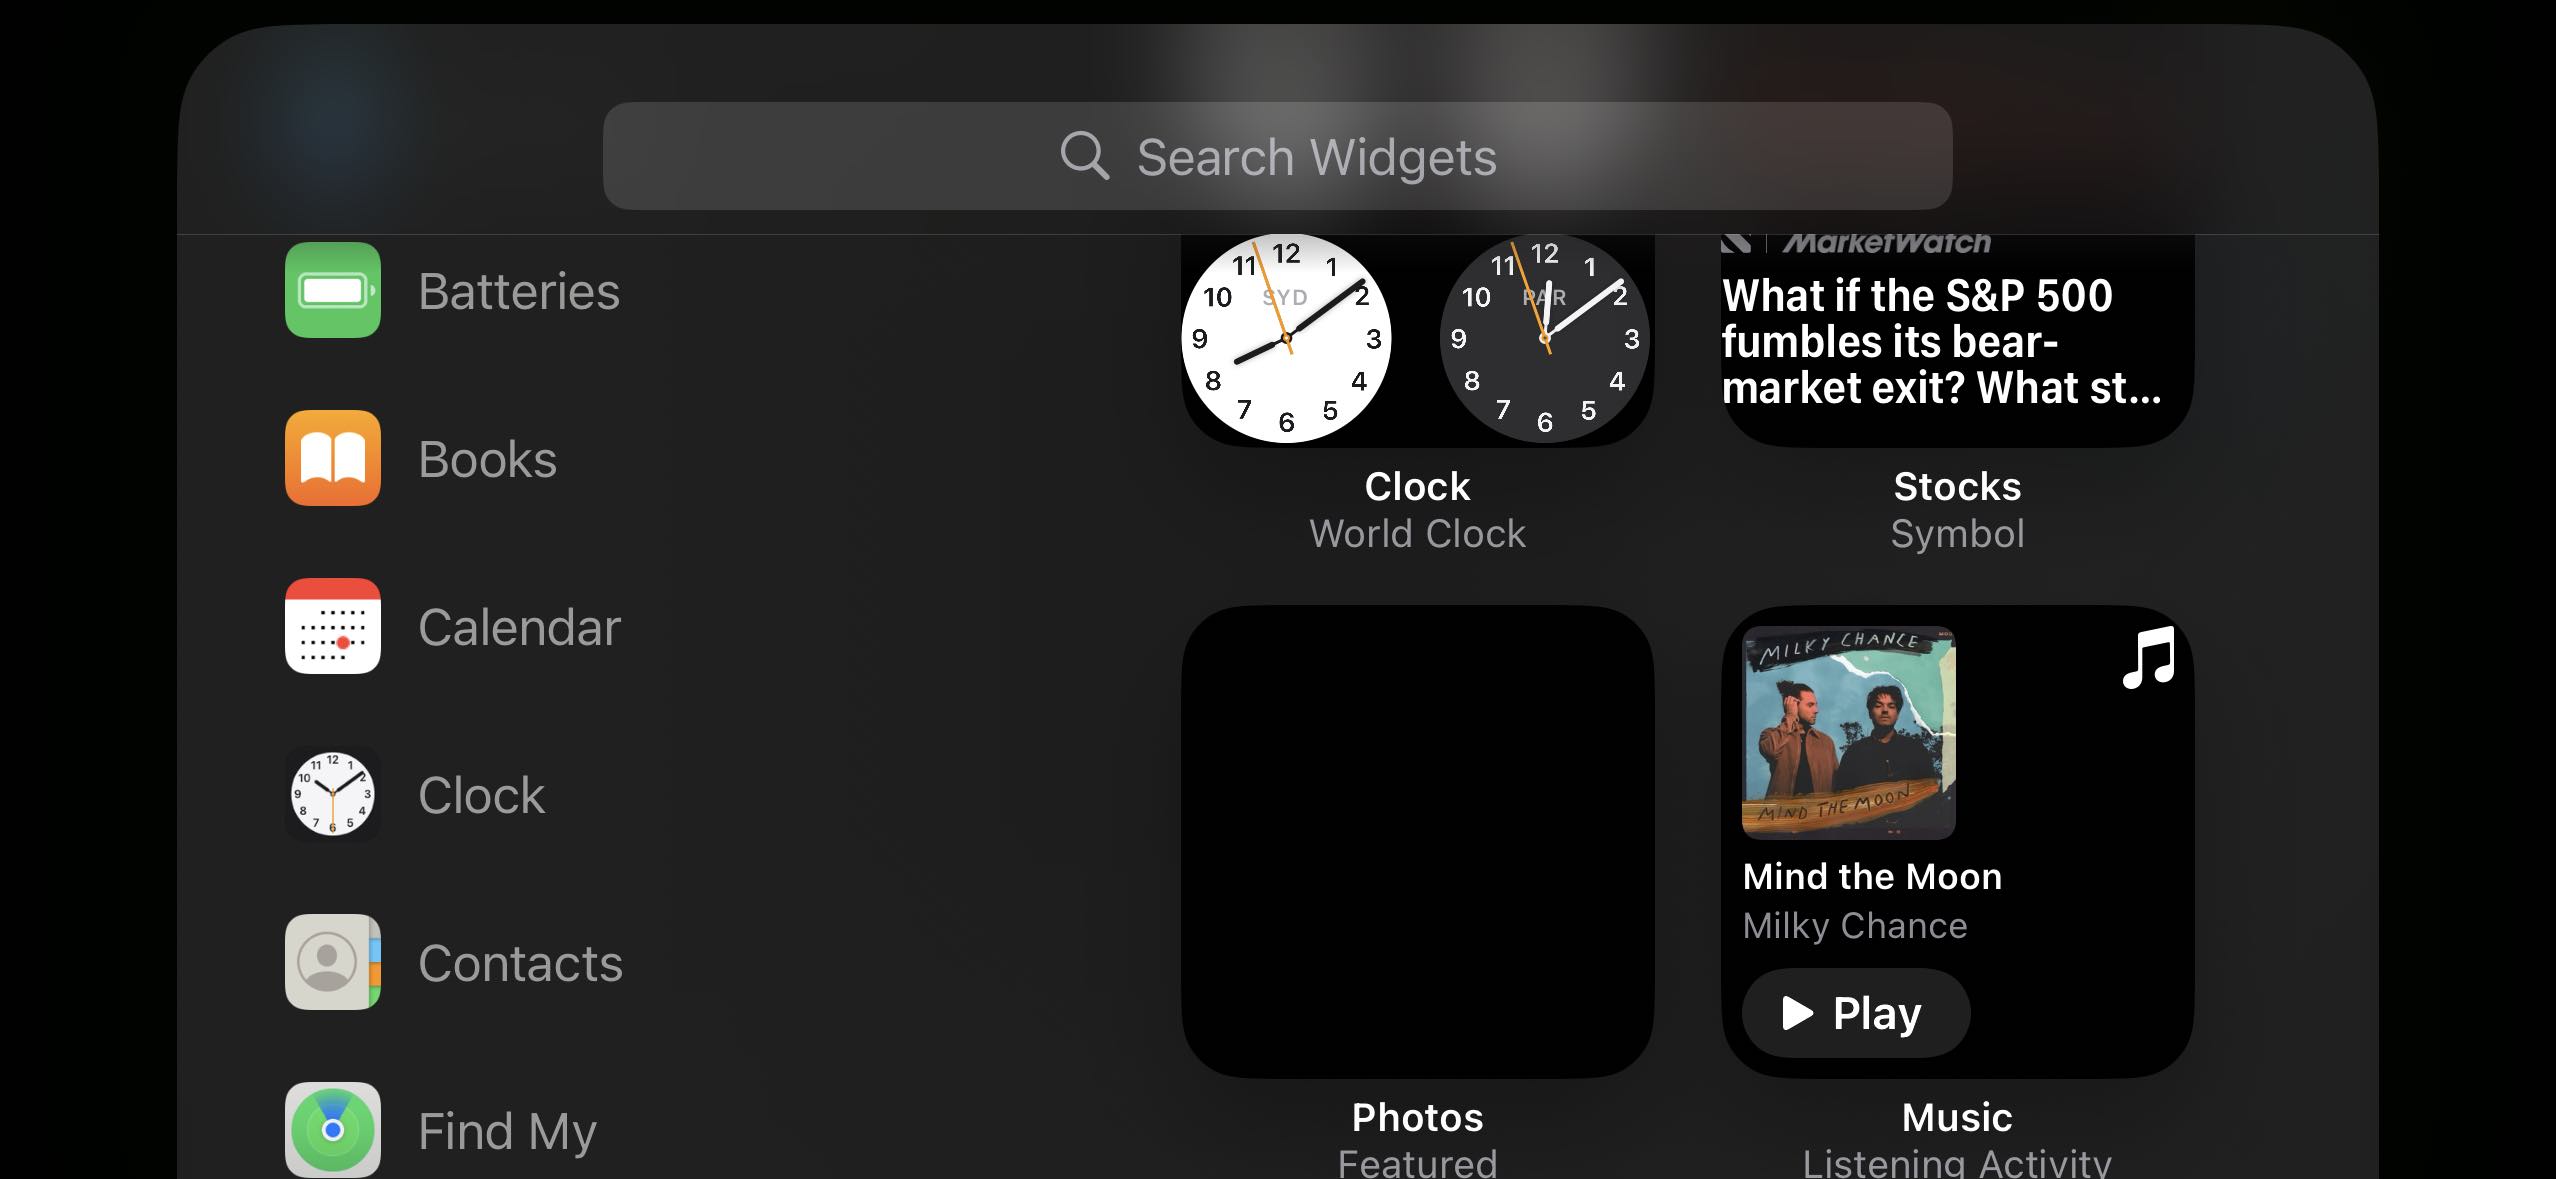
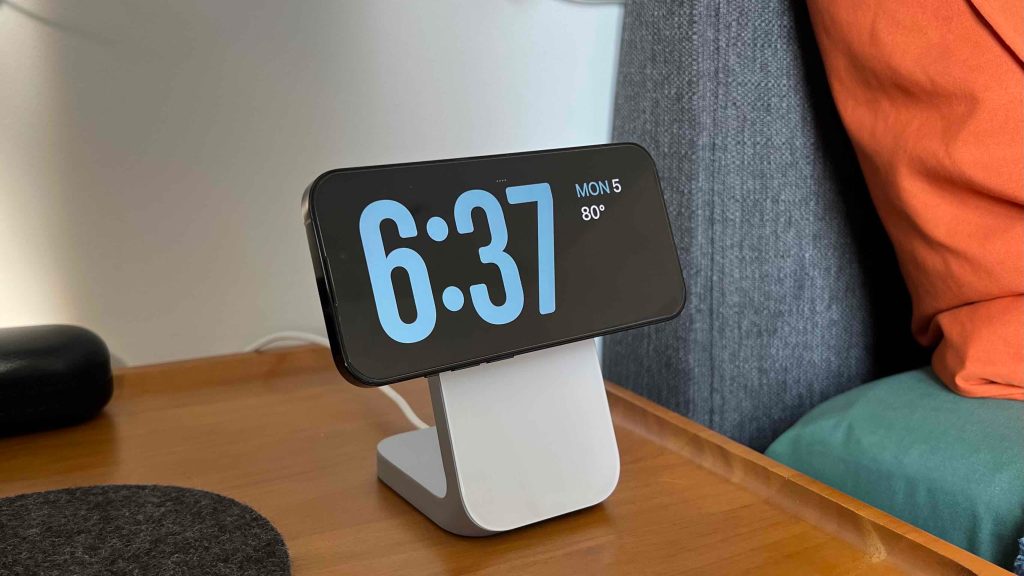
- The classic analog clock plus calendar widget on the right is the default StandBy view, swipe up on either to change them
- Press and hold on either one to add or remove widgets
- On the first StandBy view, do a big swipe from right to left to change views
- Press and hold on the other StandBy views to customize them
- iOS 17 iPhone StandBy supports Live Activities, Siri, incoming calls, and larger notifications
- StandBy remembers your “preferred view” and dims to red and night
- You can tweak StandBy settings by heading to Settings > StandBy
Here’s how iOS 17 iPhone StandBy looks in use:
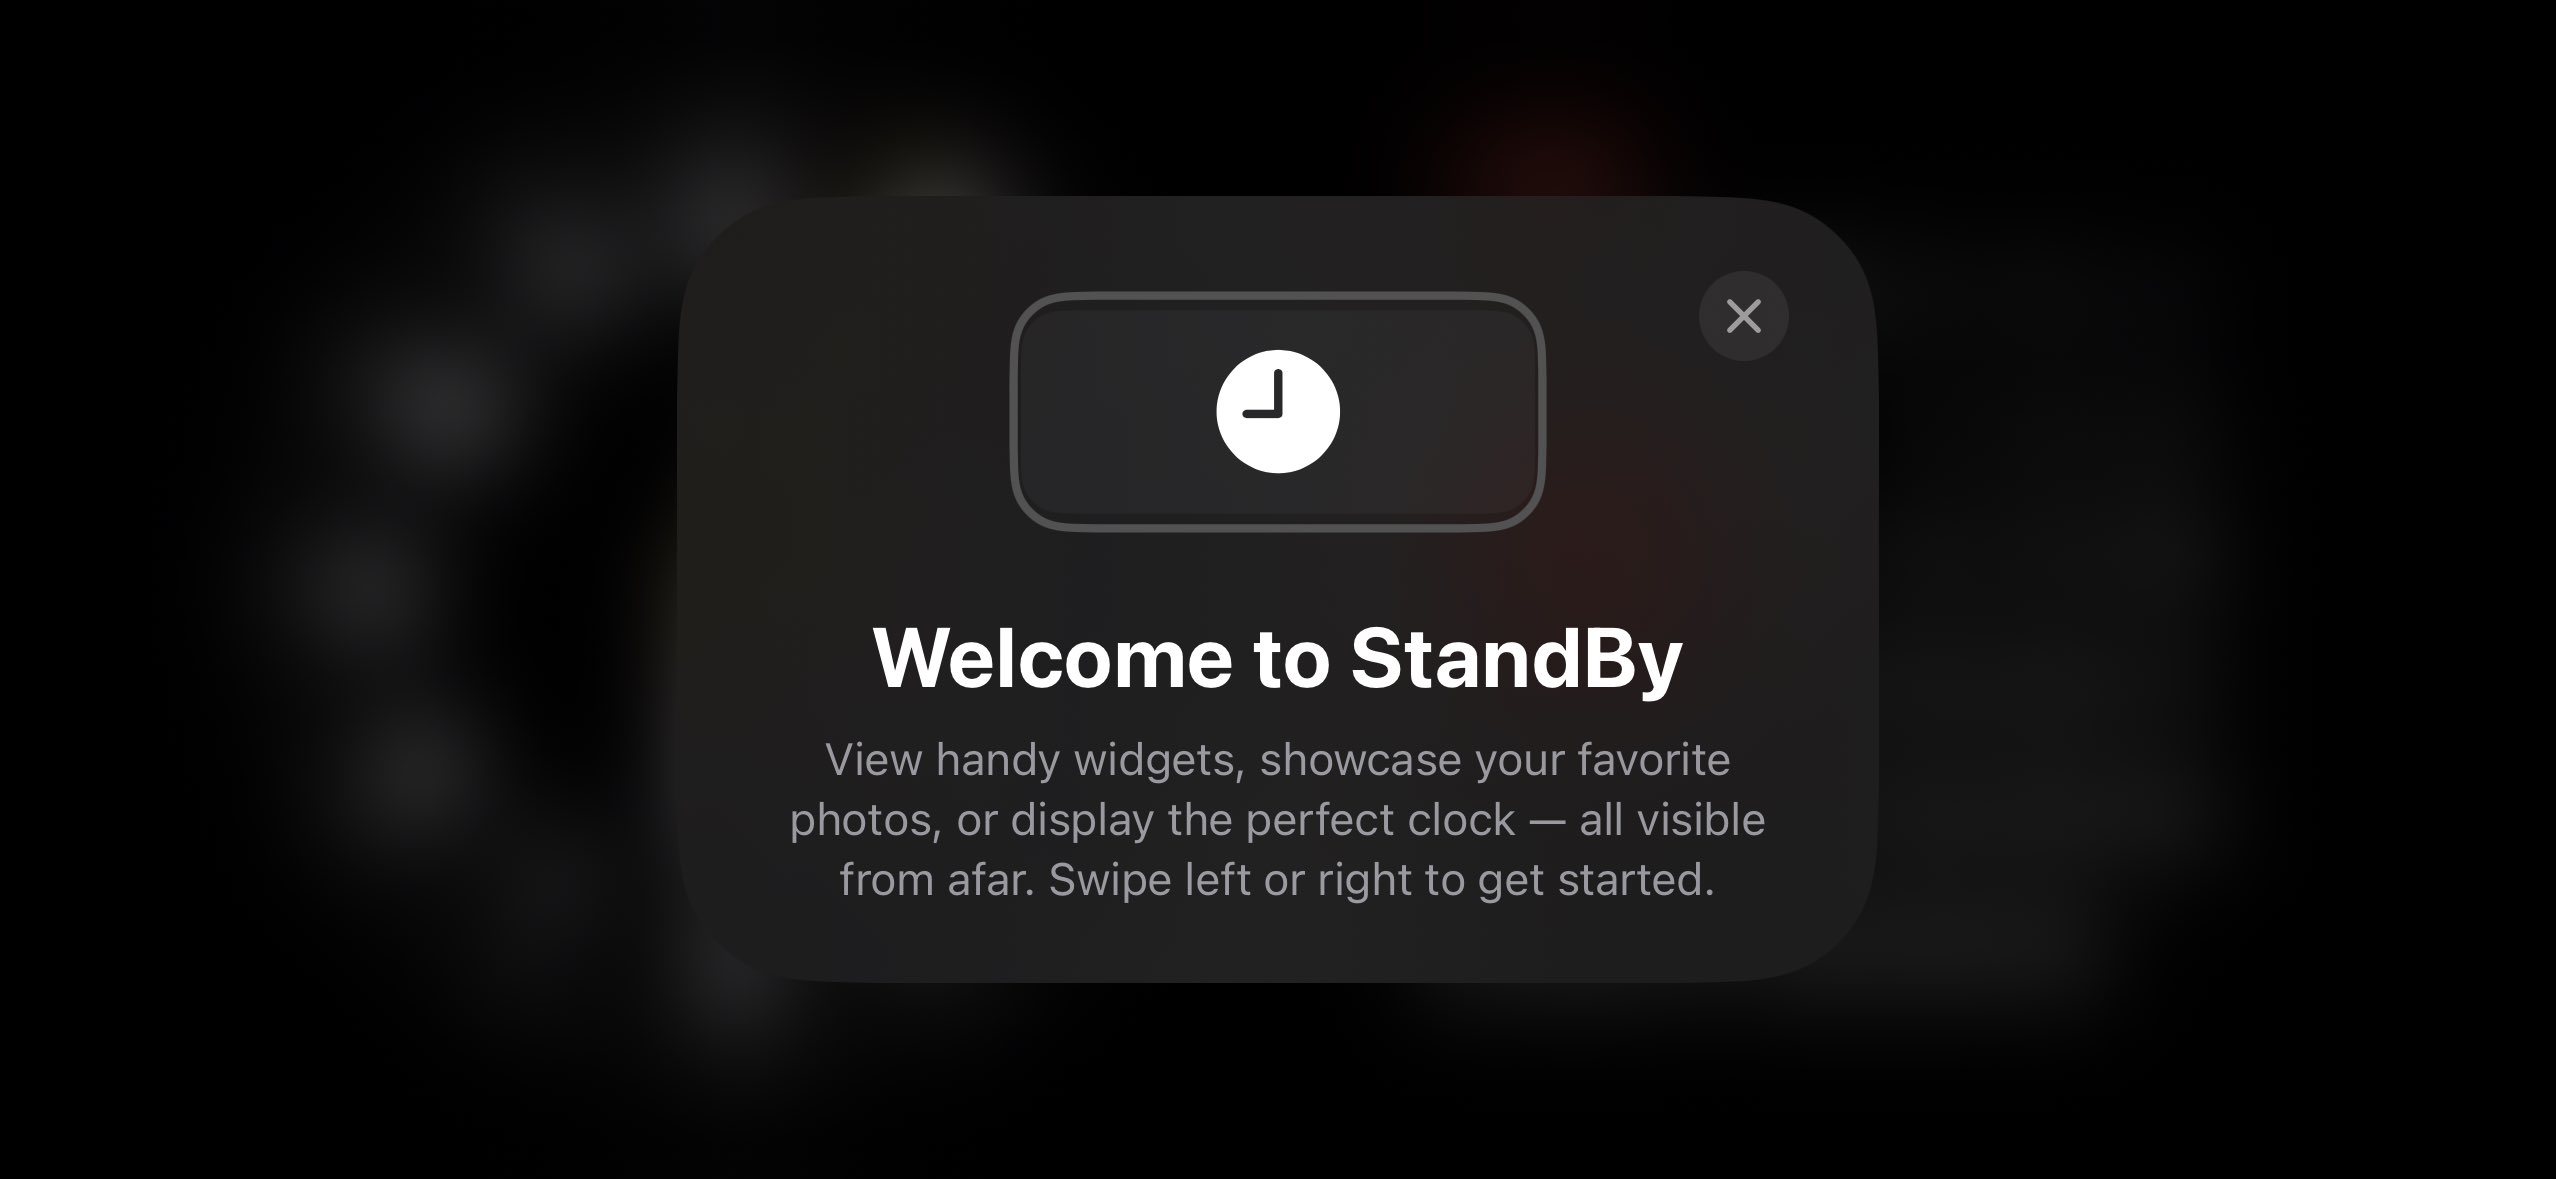
The first time you place your locked iPhone horizontally on an upright charger, you’ll see a welcome splash screen.
Now you’ll see this as the default StandBy view:
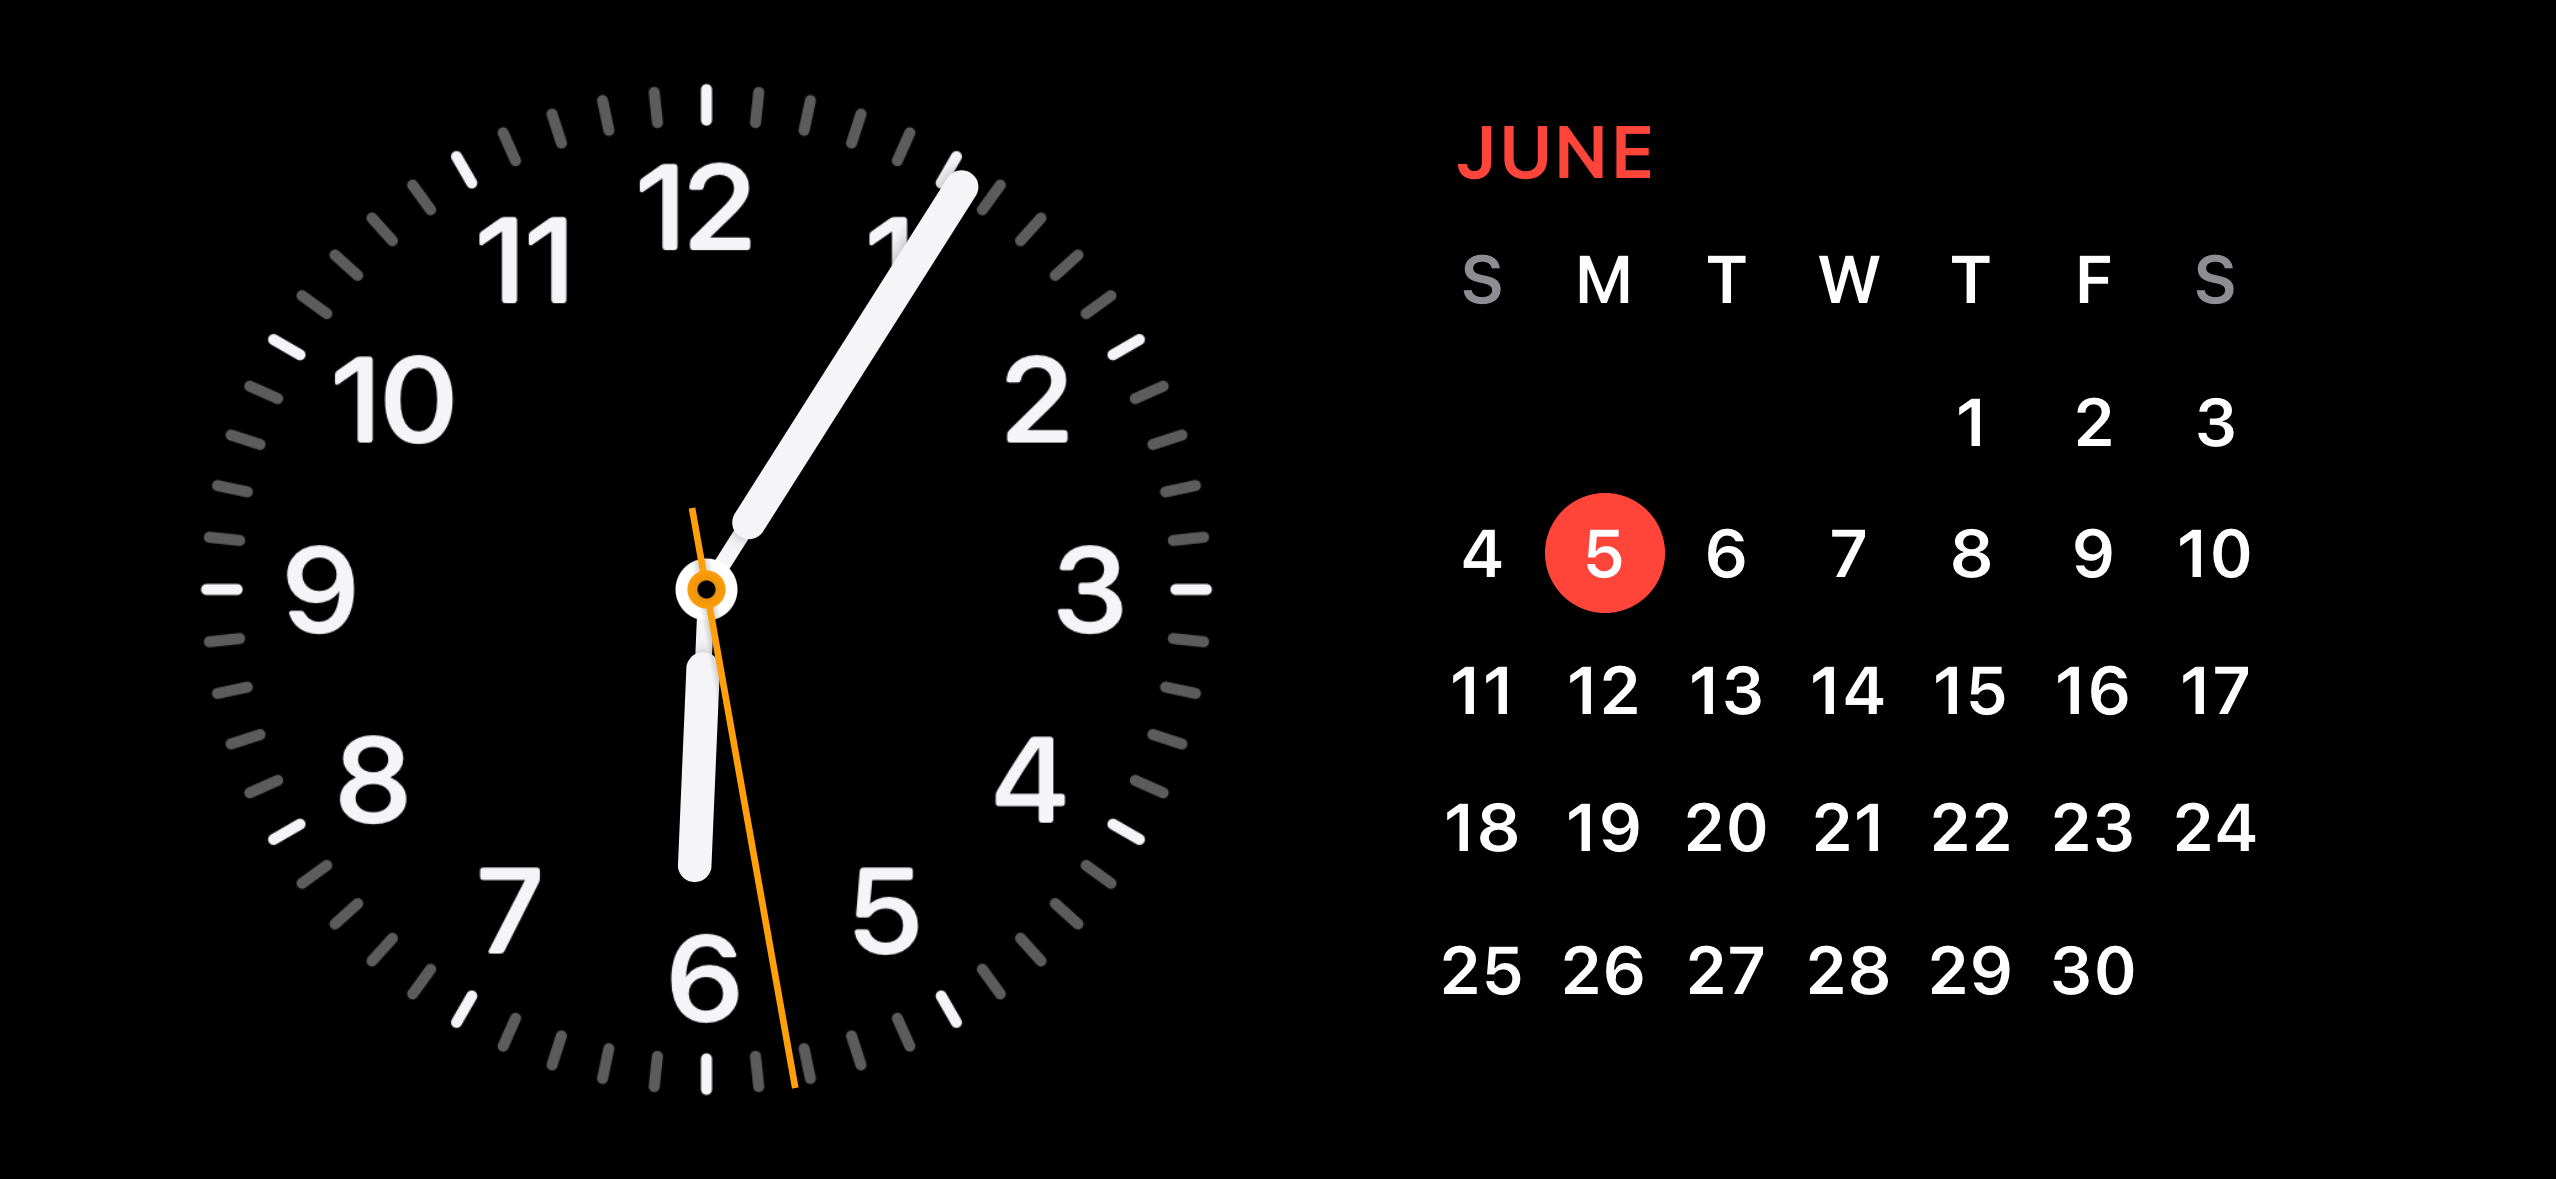
Swipe up on either the clock face or calendar to get more options (the calendar is a smart stack suggestion by default):
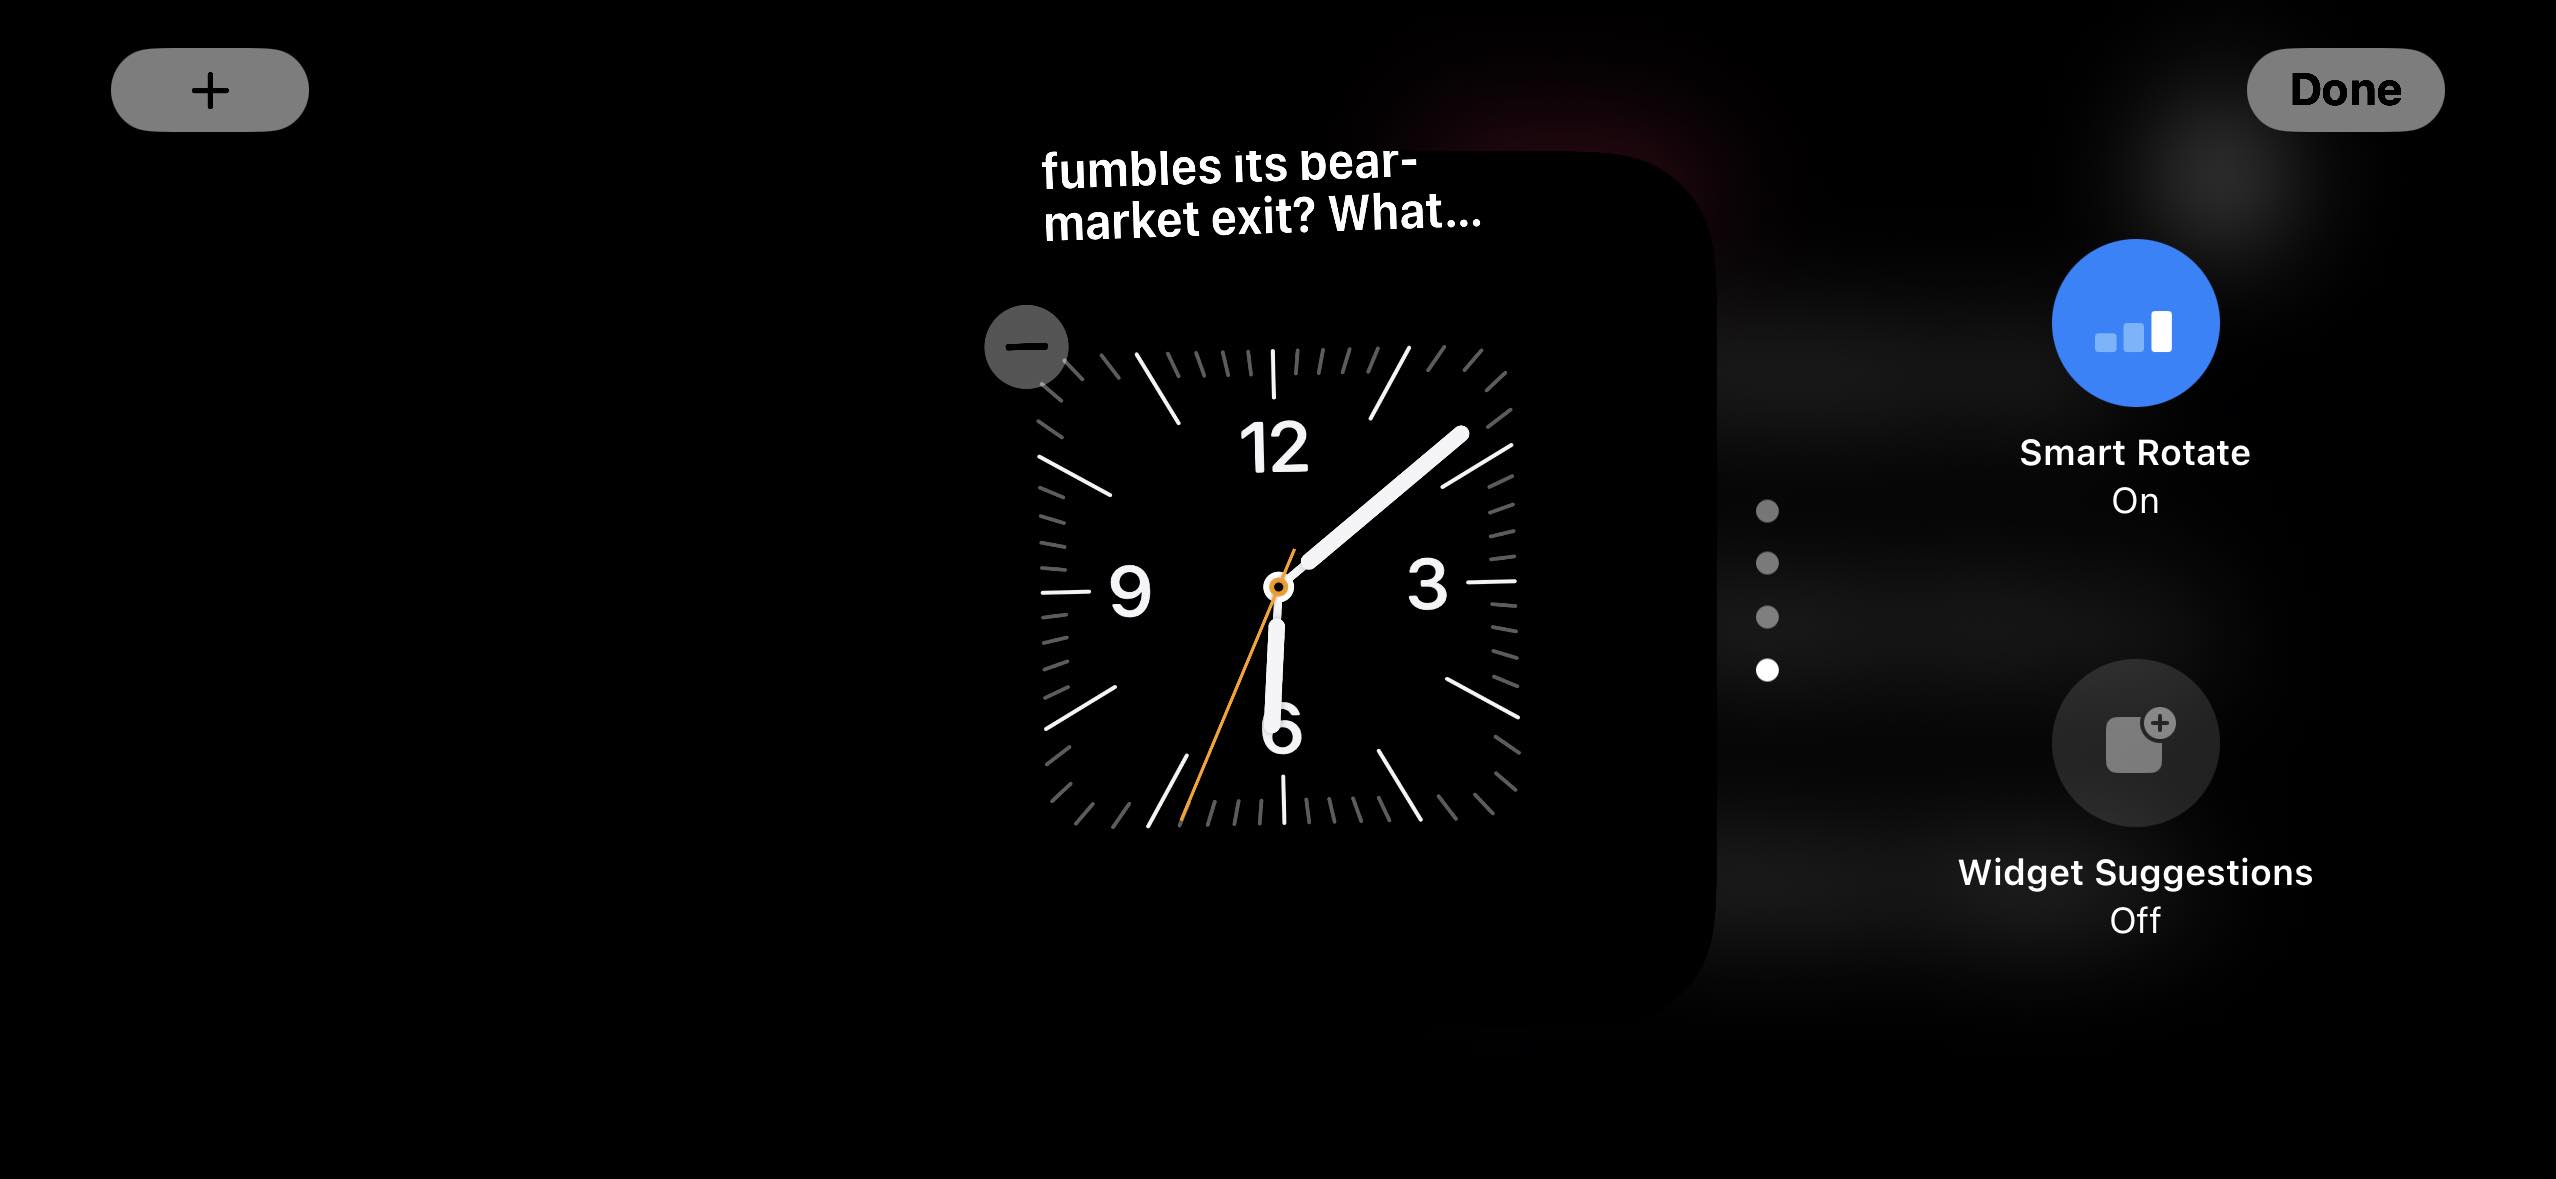
To customize this StandBy screen further, press and hold on the left or right widget. Now you can remove options or tap the + icon in the top left to add widgets:
From the first StandBy clock/widget view, you can swipe from right to left to get to the Photos StandBy view:

And swipe again to get different the last view that features different customizable clock faces:

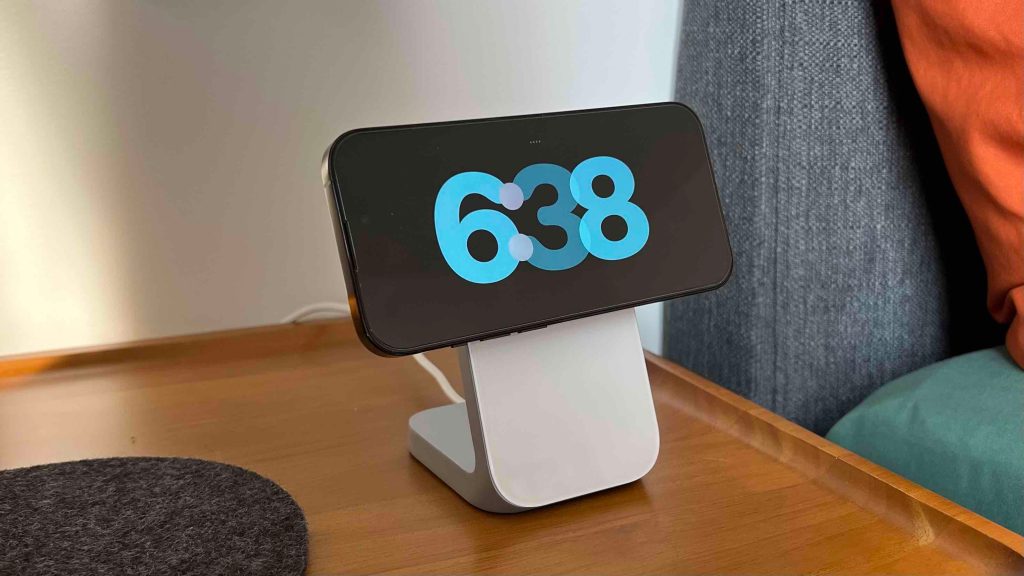
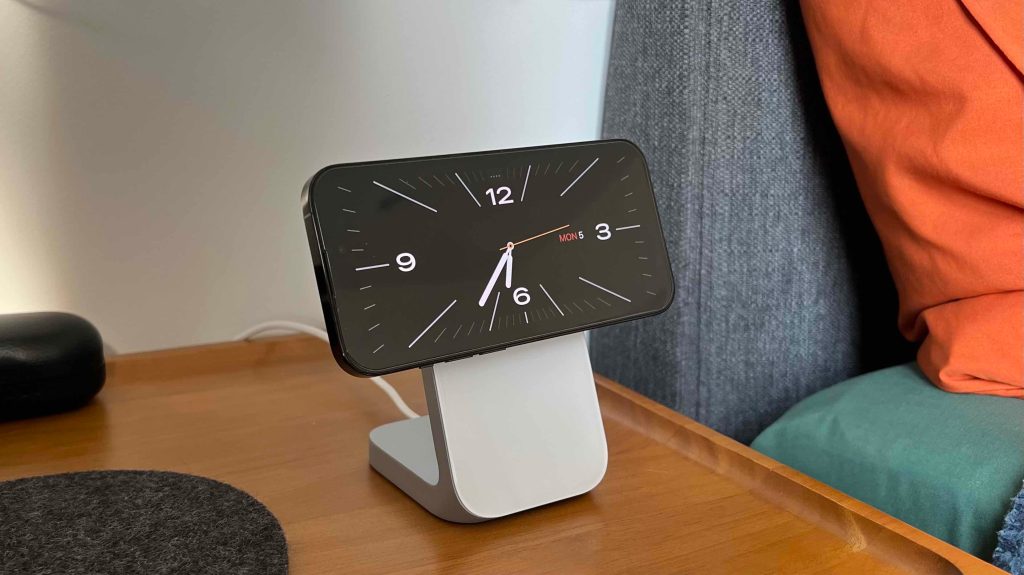
Press and hold on any of these to customize their color schemes but you can’t add widgets to these clock faces.
But you can tap the “….” icon in the top center to access music at any time which presents a nice media UI:

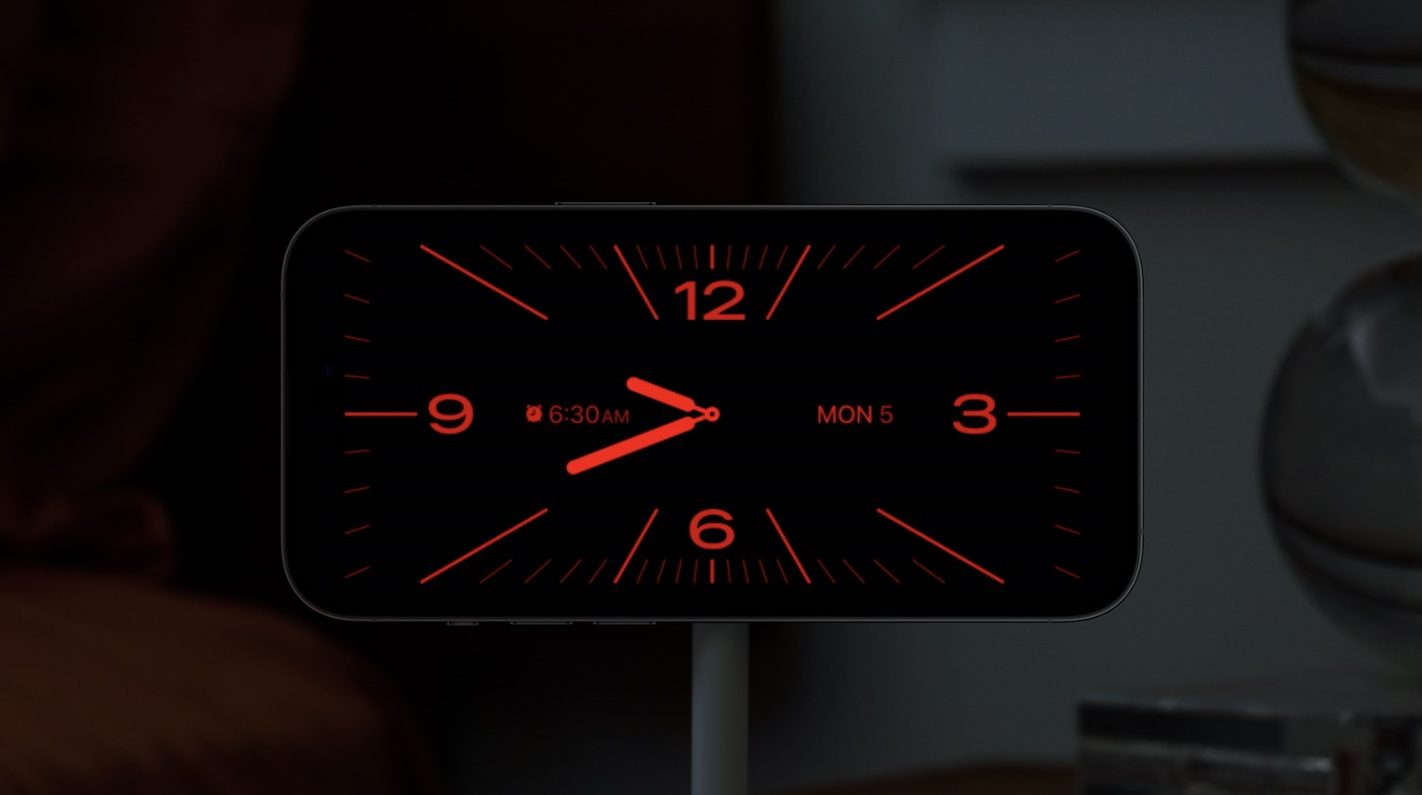
And so it doesn’t disturb sleep, iPhone StandBy for those with always-on displays will automatically dim to red at night:
Are you excited about iPhone StandBy with iOS 17? Share your thoughts in the comments!
Read more 9to5Mac tutorials:
- Here’s the new Apple Watch Heart Rate app in watchOS 10 [Gallery]
- iPhone Screen Distance in iOS 17 protects your eyes, here’s how it works
- iPhone Live Voicemail: How to use and turn off/on in iOS 17
- watchOS 10 widgets: How the new Apple Watch UI works
Add 9to5Mac to your Google News feed.
FTC: We use income earning auto affiliate links. More.

[ For more curated Apple news, check out the main news page here]
The post iOS 17 iPhone StandBy: How to use and customize the smart display feature first appeared on 9to5mac.com